
8 June 2014
Why the second coat looks worse than the first
Filed under Paint and Finishes
It is a common and demoralising experience: the first coat goes on and looks encouraging, the second goes on and the wall is suddenly covered in streaks, patches and visible laps. The instinct is to blame the paint. Usually the paint is fine and the second coat has simply revealed what the first coat was hiding.
The first coat had an excuse
A first coat over an absorbent or differently coloured surface is patchy by definition, so the eye forgives everything and reads the unevenness as incomplete coverage. By the second coat the eye expects a finished surface, so it starts noticing film thickness, sheen variation and application marks that were there all along. Some of what looks like a new problem is an old problem becoming visible.
Losing the wet edge
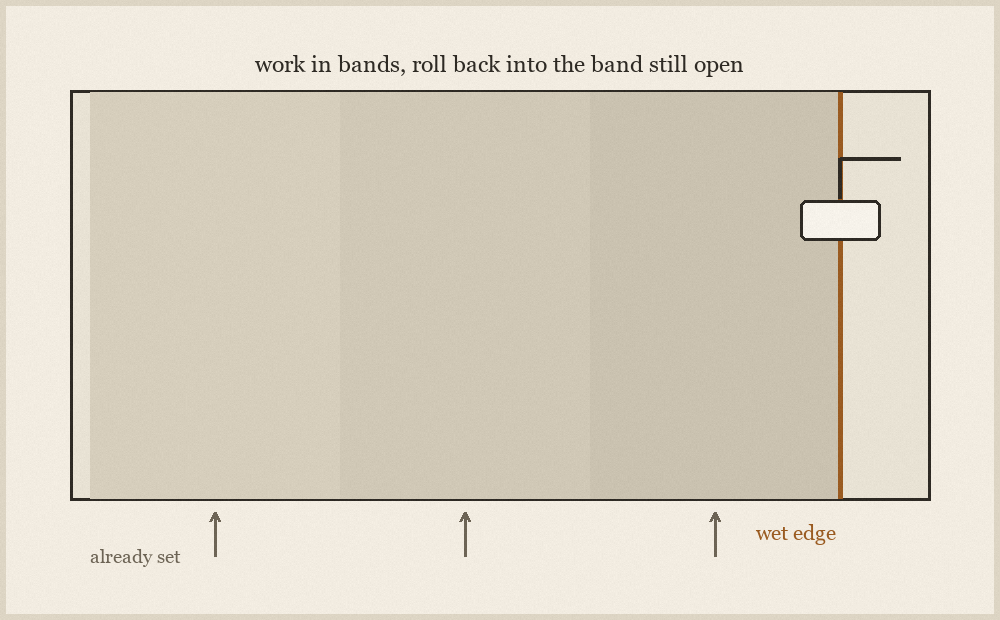
The rest of it is usually the wet edge. Paint blends invisibly into paint that is still wet and leaves a visible line against paint that has begun to set. Work in vertical bands about a roller-and-a-half wide, complete each band from ceiling to floor before moving on, and always roll back into the previous band while it is still open.
This is why stopping halfway across a wall for a phone call produces a stripe that no further coats will hide: the boundary has extra film thickness and a different sheen, and each new coat reproduces the difference. Finish the wall, then stop. A wall is the unit of work, not a room and not a section.
Conditions make the window shorter
Warmth, moving air and direct sun all shorten the time the edge stays open, sometimes drastically. Painting a sunlit wall in the afternoon means the top of the band is setting before you reach the bottom. Close blinds, work the sunlit wall early or late, and turn fans away from the surface. Cooler and still is slower and better.
Loading and pressure
Uneven pressure produces uneven film. A well-loaded roller should be worked with almost no pressure at all; the paint comes off by contact, not by squeezing. Pressing hard because the roller is running dry forces out what is left near the ends of the sleeve and leaves tracks down each side of the pass. Reload before it feels necessary, and finish each band with a light pass from top to bottom in one direction to leave a consistent texture.
Keep the same sleeve for the whole job. Different naps leave different textures, and swapping to a fresh sleeve of a different type between coats produces a patch that reads as a defect under raking light even though the colour matches perfectly.
When to stop and let it be
Paint continues to level as it dries, and a wall inspected from a hand's distance while wet always looks worse than the same wall inspected from across the room the next morning. Resist touching up a nearly-dry wall: a touch-up on setting paint leaves a mark with a different film thickness and almost always looks worse than what it was meant to fix. Let it dry fully, look at it in daylight, and only then decide whether anything needs doing.