Shim mark: a pair of opposing wedges

Sawdust and Shims

A working journal of small repairs, paint and trim, written a job at a time.

Journal

Every entry, newest first. Fourteen jobs written up as they were done.

Cutting a clean line where wall meets ceiling

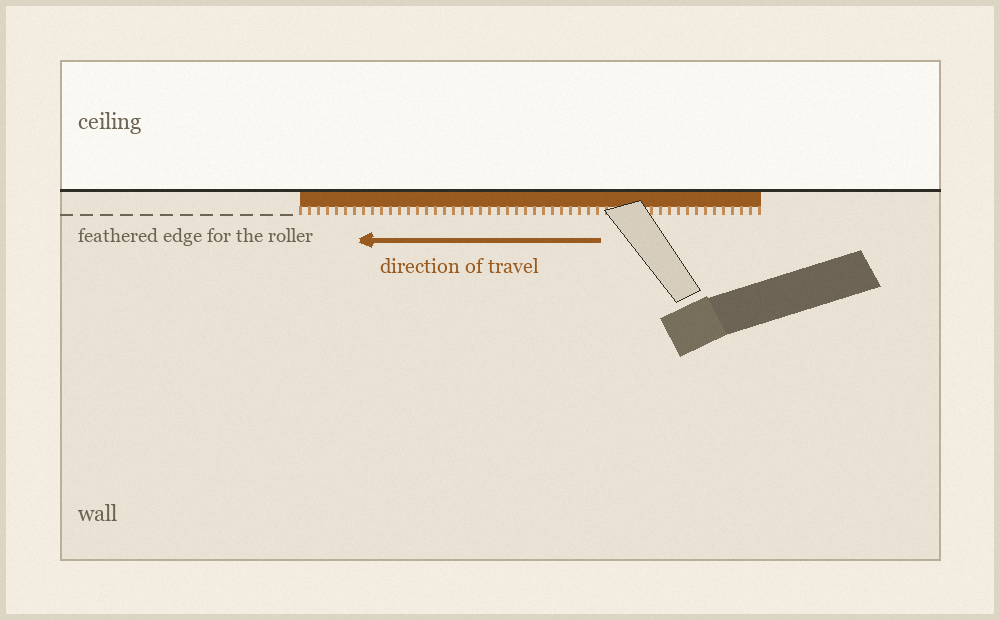
Diagram of a paint brush held flat against a wall just below the ceiling line, showing the bead of paint running ahead of the bristle tips.
A loaded brush held flat to the wall, with the ferrule kept off the ceiling line.

Filed under Paint and Finishes

Cutting in is the part of painting that decides whether a room looks finished or looks attempted. Everything else is coverage. The line where the wall stops and the ceiling begins is at eye level for the whole life of the room, and a wobble there is the first thing a visitor's eye lands on, long before anyone notices that the roller left a light patch behind the door.

Read the rest of this entry

What a shim actually does, and why you need more than one

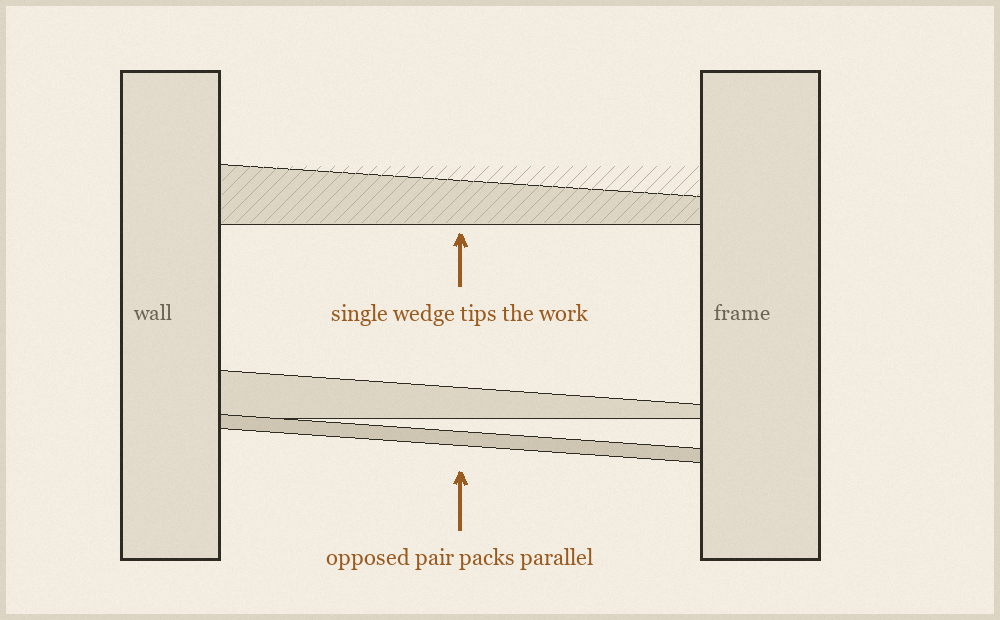
Diagram of two tapered wooden shims overlapped in opposite directions between a door frame and a wall, forming a flat packing block.
Two tapered shims driven from opposite sides, making a parallel-sided packer of adjustable thickness.

Filed under Tools and Materials

A shim is a thin tapered wedge, and on its own it is nearly useless for the job most people try to do with it. Driven into a gap alone, a single shim does not fill the gap; it fills a triangle. Whatever it is holding ends up tipped by exactly the angle of the taper, which is why a door hung on single shims swings shut on its own and a shelf packed with one sits proud at the front.

Read the rest of this entry

Reading a stud finder that keeps lying to you

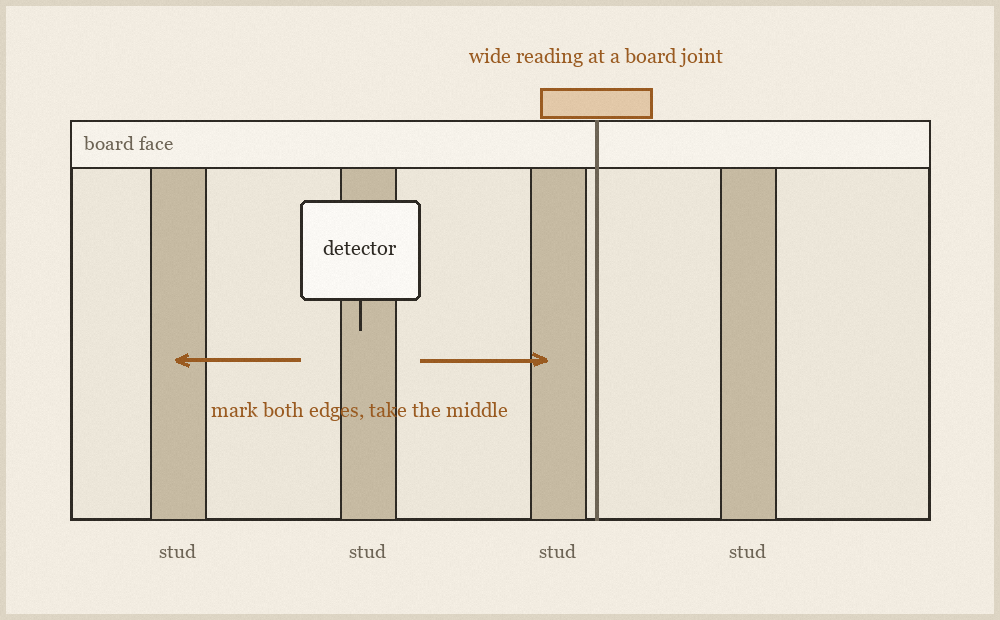
Cutaway diagram of a stud wall showing plasterboard over vertical timber studs, with a wide shaded band marking where a density detector reads a false positive at a board joint.
A wall section showing board, framing and the wider signal a detector reads at a joint.

Filed under Walls and Trim

A density stud finder does not find timber. It finds a change in how much material sits behind the surface, and then reports that change as an edge. Most of the time the change is a stud. Sometimes it is a board joint, a run of tape and compound, a pipe, a cable, an old repair, or a second layer of board that stops halfway across the room. The tool is not lying so much as answering a narrower question than the one you asked.

Read the rest of this entry

Patching a doorknob hole so the repair disappears

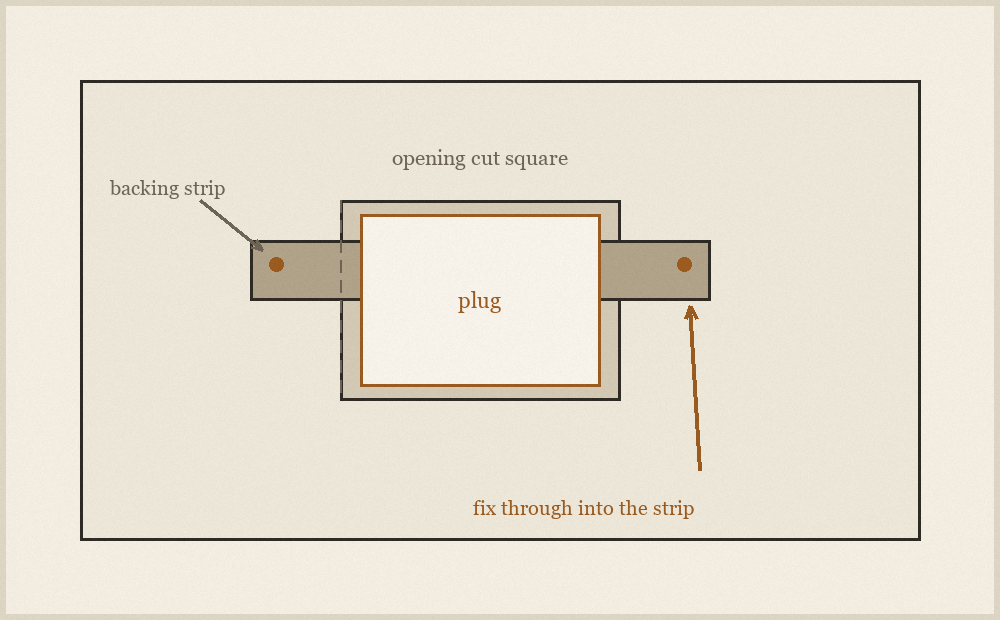
Diagram of a rectangular hole cut in plasterboard with a timber backing strip inside the cavity, held against the back of the board while a plug is fitted into the opening.
A backing strip fed into the cavity and drawn tight while the adhesive sets.

Filed under Walls and Trim

The hole a door handle punches into a wall is small, round and deep, and it is the most commonly botched repair in a house. Filler alone will not hold, because there is nothing behind it: the compound sags into the cavity as it dries and leaves a dimple that catches light from the side forever after. The repair needs something to bear against before it needs anything to smooth over.

Read the rest of this entry

Choosing a sheen before choosing a colour

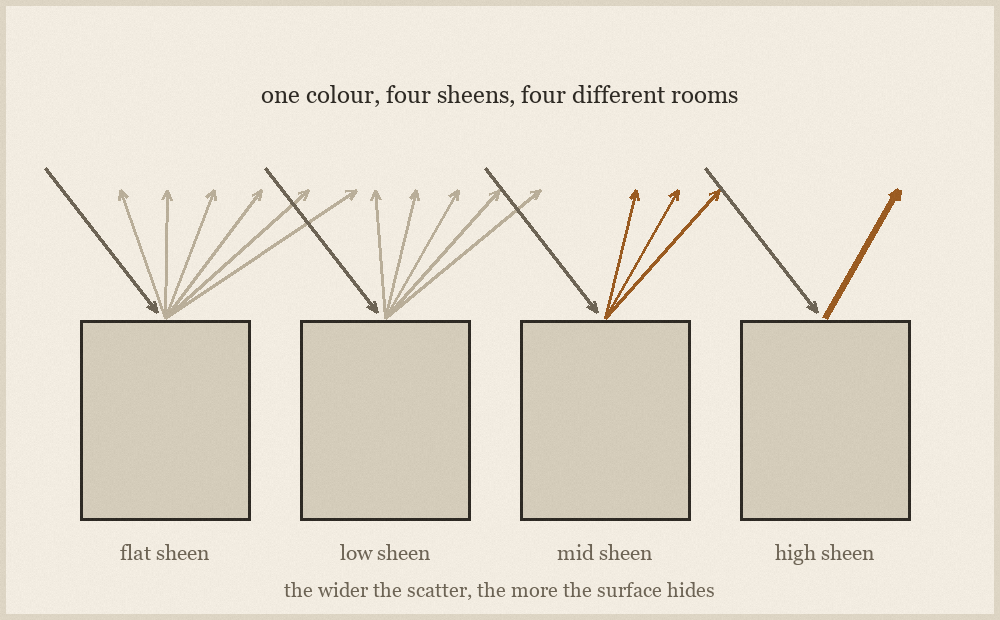
Diagram comparing four painted panels of the same colour at flat, low, mid and high sheen, with arrows showing how much light each reflects toward the viewer.
The same colour at four sheen levels, showing how reflected light changes what the eye reads.

Filed under Paint and Finishes

People choose colour for weeks and sheen in the last thirty seconds at the counter, and then wonder why the finished room does not look like the sample card. Sheen changes how much light bounces back at you, and light bouncing back at you is most of what you perceive as colour. The same tin, applied flat and applied at a higher sheen, will read as two different colours on two walls of one room.

Read the rest of this entry

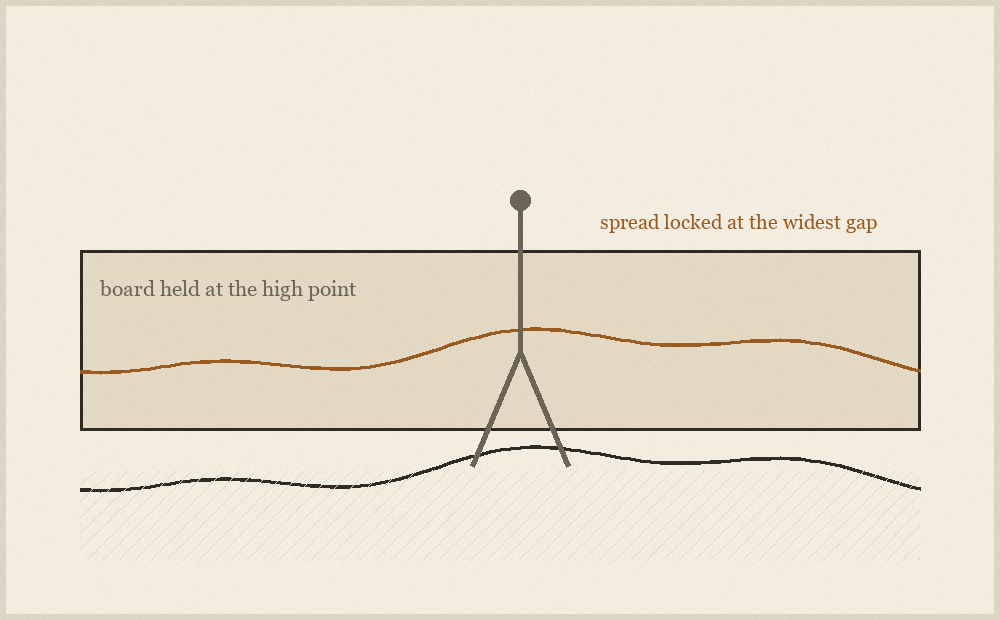
Scribing a baseboard to a floor that is not flat

Diagram of a compass with one leg on an uneven floor and the other marking a matching line along the face of a length of skirting board held against the wall.
Compass legs held at a fixed spread, tracing the floor contour onto the face of the board.

Filed under Walls and Trim

A board cut square meets a floor that is not, and the result is a wandering gap that no amount of filler makes honest. Scribing solves it by transferring the actual shape of the floor onto the board, so the cut follows the contour instead of ignoring it. It is one of the few genuinely old techniques that nothing has improved on.

Read the rest of this entry

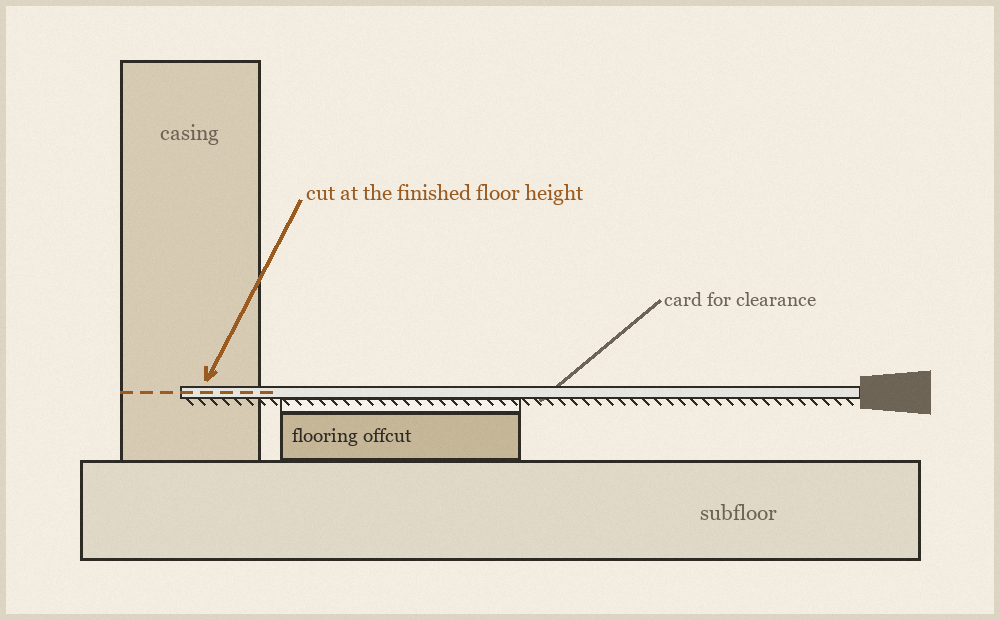
Undercutting door casing before the floor goes down

Diagram of a flush-cutting saw resting on an offcut of flooring beside a door casing, showing the cut line set at the height of the finished floor.
An offcut of the new floor used as a height gauge for the saw.

Filed under Floors

There are two ways to get a new floor past a door casing. You can cut the floor around the shape of the casing, or you can cut the casing and slide the floor underneath. The second is faster, more forgiving and looks better, and the only reason it is not universal is that it has to be done before the floor is laid, when the temptation is to get boards down and worry about details later.

Read the rest of this entry

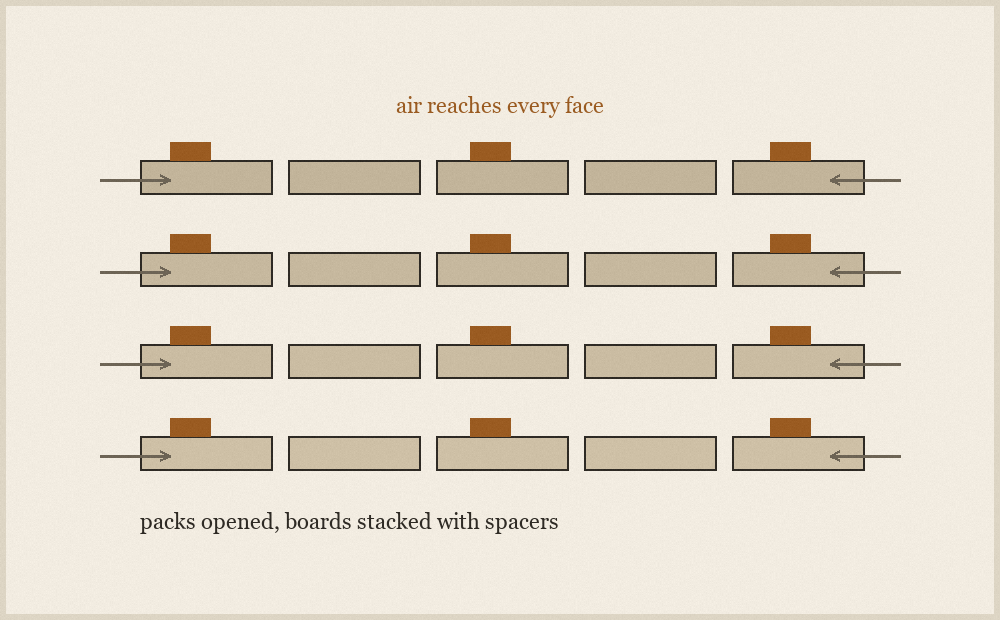
Acclimating boards, and what happens when you skip it

Diagram of flooring packs stacked with timber spacers between the layers, allowing air to circulate around each board in the room where the floor will be laid.
Boards stacked in loose layers with spacers between them, opened in the room they will live in.

Filed under Floors

Timber takes up and gives off moisture until it is in balance with the air around it, and as it does so it changes size across the grain. Every problem that shows up in a wood floor months after it was laid is a version of this one fact. A floor laid dry in a damp room swells and buckles; a floor laid damp in a dry room shrinks and opens gaps between every board.

Read the rest of this entry

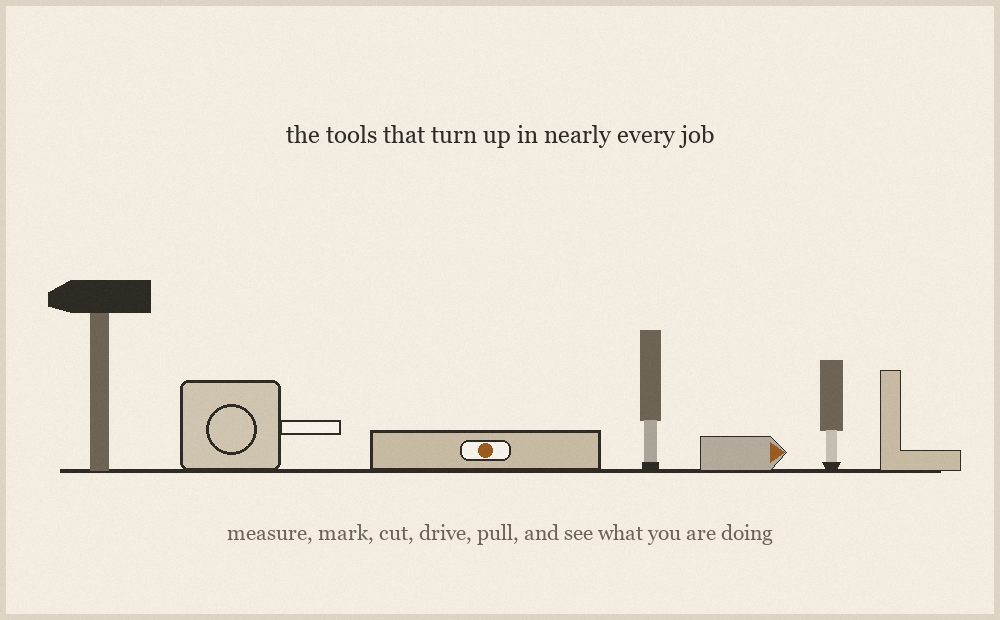
A small tool kit that covers most of a first year

Diagram of a compact tool kit laid out in a row: claw hammer, tape measure, spirit level, screwdrivers, utility knife, chisel, hand saw and a combination square.
A short list of tools laid out as they are actually reached for, rather than as a catalogue.

Filed under Tools and Materials

Most first tool kits are bought as a boxed set and half of it is never touched. The tools that actually earn their place are the ones that turn up in nearly every job regardless of what the job is, and there are fewer of them than the box suggests. What follows is a short list, with the reason each one keeps reappearing.

Read the rest of this entry

Why the second coat looks worse than the first

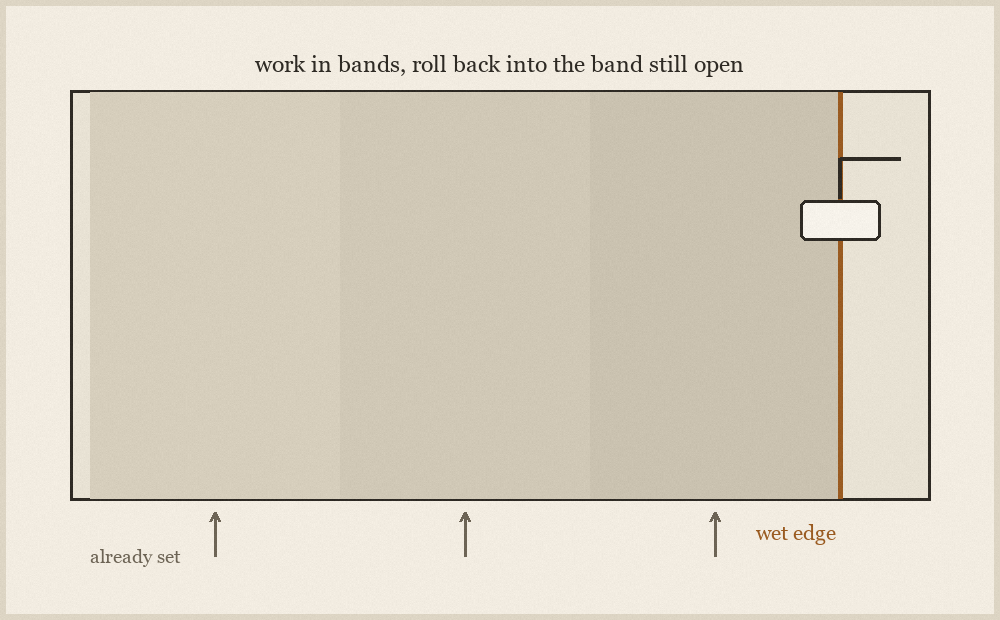
Diagram of a paint roller travelling across a wall in overlapping passes, with the boundary between the still-wet area and the drying area marked.
A roller working a wet edge across a wall, with the previous pass still open.

Filed under Paint and Finishes

It is a common and demoralising experience: the first coat goes on and looks encouraging, the second goes on and the wall is suddenly covered in streaks, patches and visible laps. The instinct is to blame the paint. Usually the paint is fine and the second coat has simply revealed what the first coat was hiding.

Read the rest of this entry

Sanding between coats without sanding through

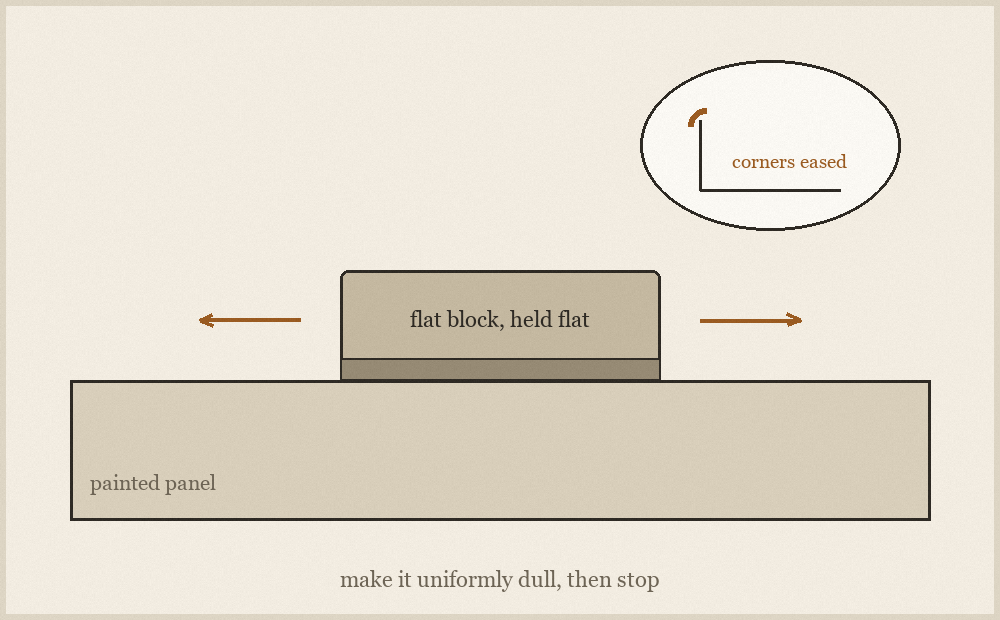
Diagram of a hand sanding block held flat on a painted panel, with an inset showing the eased corners of the abrasive paper.
A flat block used flat, with the edges of the paper eased to prevent tracking.

Filed under Paint and Finishes

Sanding between coats is not about removing material. It is about knocking down the grain and the dust nibs that rose into the last coat so the next one has a flat surface to sit on. Once you hold that idea, the technique follows: light, flat, fine, and quick. Almost every failure comes from treating it as shaping rather than smoothing.

Read the rest of this entry

Setting a fence post that stays where you put it

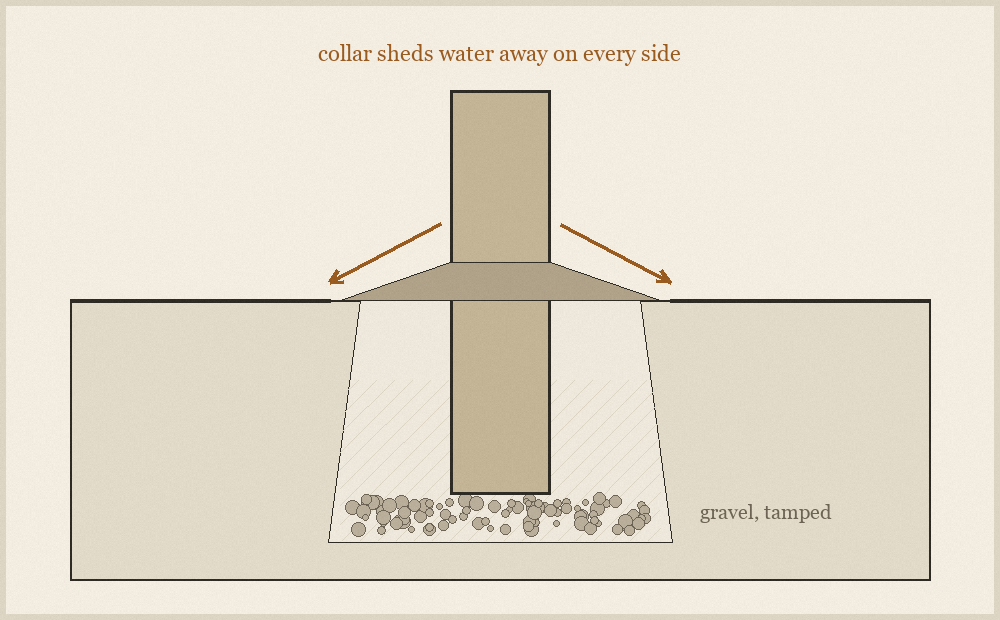
Cutaway diagram of a fence post in a hole, showing gravel at the base, backfill around the post and a sloped collar at ground level directing water away.
A post set with its collar shaped to shed water away from the timber.

Filed under Outdoors

A fence post fails at ground level, almost without exception. It does not rot at the bottom, where people expect it to, and it rarely snaps in the middle. It goes where air and water meet the timber together, in the band just above and just below the surface, and everything about setting a post well is really about managing water at that band.

Read the rest of this entry

Sharpening a chisel on sandpaper and glass

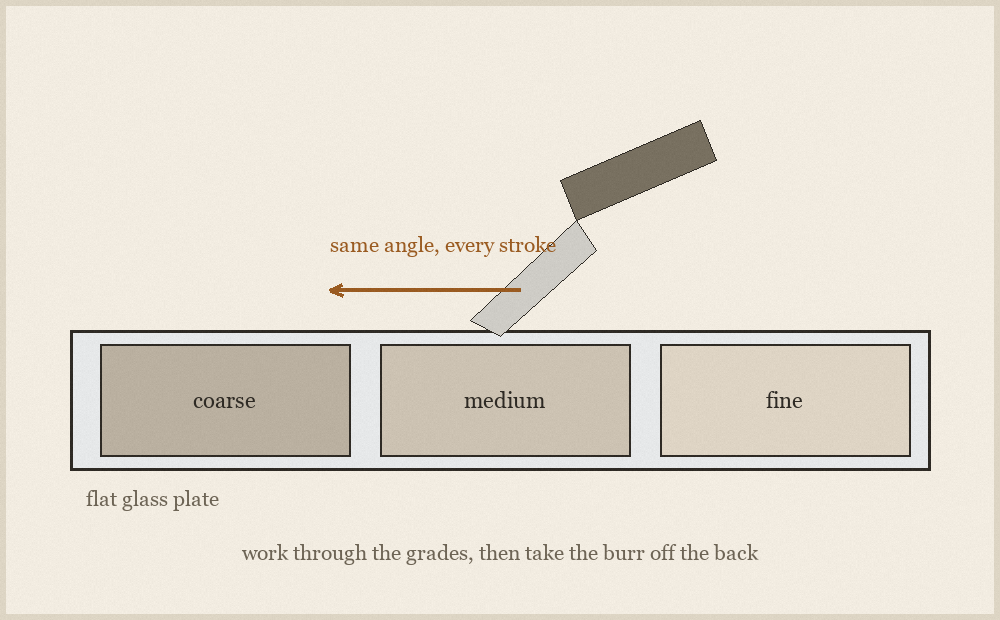
Diagram of three grades of abrasive paper stuck to a flat glass plate, with a chisel held at a fixed angle being drawn across the finest sheet.
Abrasive sheets on a flat glass plate, worked from coarse to fine in one direction.

Filed under Tools and Materials

A sharp edge is two flat surfaces meeting, and sharpening is the business of making both of them flat and making them meet cleanly. Nothing else in the process matters as much as that, which is why sharpening on abrasive paper stuck to a piece of flat glass works as well as it does. The glass supplies the flatness; the paper supplies the cut.

Read the rest of this entry

Fixing a squeaking floor from above

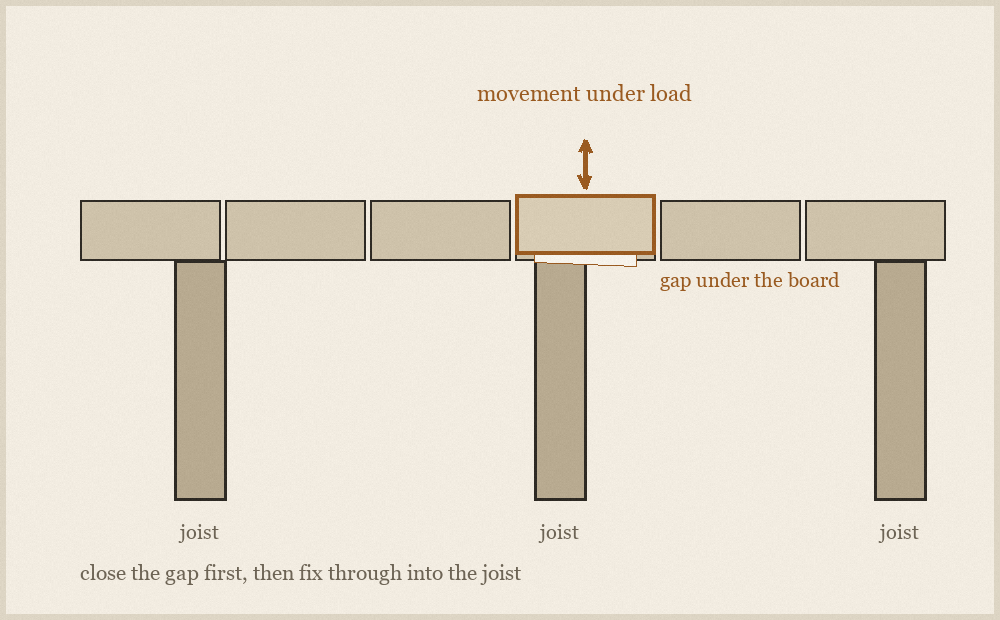
Cutaway diagram of floorboards over a joist, showing a gap under one board and an arrow marking the movement that produces a squeak.
A board rising and falling against a fixing as the load moves across it.

Filed under Floors

A floor squeak is movement, and the movement is almost always a board rising off its support under load and dropping back as the load passes. The noise itself is a nail shank rubbing in its hole, or two edges of timber moving against each other. Find which of those two it is and the repair is straightforward. Guess, and you will fix half the squeaks in the room and create a few new ones.

Read the rest of this entry

Labels

  • Paint and Finishes (4)Brushwork, sheen, sanding between coats and the things that go wrong on the second pass.
  • Walls and Trim (3)Plaster and board repairs, finding what is behind the surface, and fitting trim to rooms that are out of true.
  • Floors (3)Boards, thresholds, squeaks and the preparation that decides how a floor behaves later.
  • Tools and Materials (3)What a tool is actually for, what a first kit needs, and keeping an edge worth using.
  • Outdoors (1)Work that has to survive weather, frost and ground that moves.