
27 September 2015
What a shim actually does, and why you need more than one
Filed under Tools and Materials
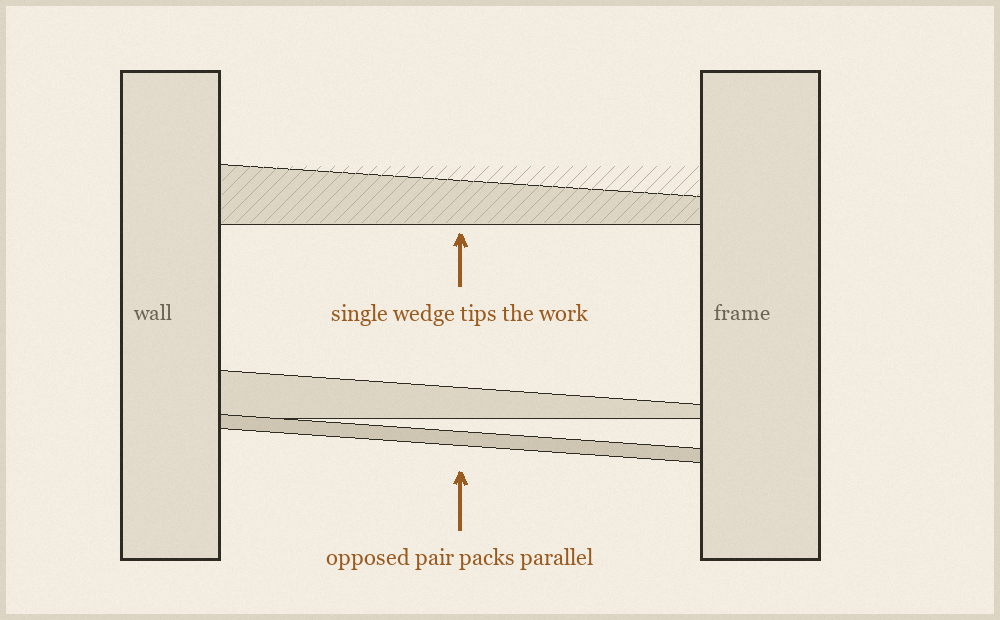
A shim is a thin tapered wedge, and on its own it is nearly useless for the job most people try to do with it. Driven into a gap alone, a single shim does not fill the gap; it fills a triangle. Whatever it is holding ends up tipped by exactly the angle of the taper, which is why a door hung on single shims swings shut on its own and a shelf packed with one sits proud at the front.
Used in pairs, the same wedge becomes something else entirely. Slide one in from the left and one in from the right, overlapping, and the two tapers cancel: the sandwich has parallel faces, and its thickness is adjustable by sliding the pair against each other. That is the whole trick, and it is the reason shims come in packets rather than singly.
Setting a pair
Push both shims in by hand first and get them close, then tap one at a time with light blows, alternating sides. Alternating matters: if you drive one home fully and then start on the other, the first has already taken the load and the second only splits it. Small taps on alternating sides let the pair creep up together and keep the faces parallel the whole way.
Check the thing you are packing, not the shims. Put the level on the door jamb or the cabinet stile and watch the bubble as you tap. A shim is a means, and the moment you start admiring how tightly the wedge is wedged, you have stopped watching the only thing that matters.
Where they go
Pack behind fixings, not between them. A screw driven through a jamb that is packed somewhere else simply pulls the jamb into a curve, and no amount of adjustment afterwards will take that curve out. The order is: position, pack directly behind the fixing point, check, then drive the screw. If you find yourself levering the workpiece with a screwdriver to get the packing in, the packing is in the wrong place.
On a door frame, three pairs a side is the usual arrangement: one behind the top hinge, one behind the bottom hinge, and one at the middle or behind the striker. The hinge positions carry the weight of the door and the striker position carries the push of the latch, so those are the three places where a soft spot will show up as a door that drops or a latch that no longer meets its keeper.
Trimming
Once the fixing is in, the tails have to come off flush, and snapping them is quicker than sawing. Score the shim along the face of the frame with a knife, then push the tail sideways rather than pulling it out; it breaks at the score and leaves nothing proud for the architrave to sit on. Pulling straight out is what loosens the pair you just spent five minutes setting.
Composite shims made from plastic hold their shape in a damp opening where softwood will compress, which matters below a threshold or anywhere a floor gets washed. Wooden shims split more kindly and take a screw through them without cracking, which matters when the fixing has to pass through the packing rather than beside it. Keeping both in the box costs nothing and saves a trip.