
16 August 2015
Reading a stud finder that keeps lying to you
Filed under Walls and Trim
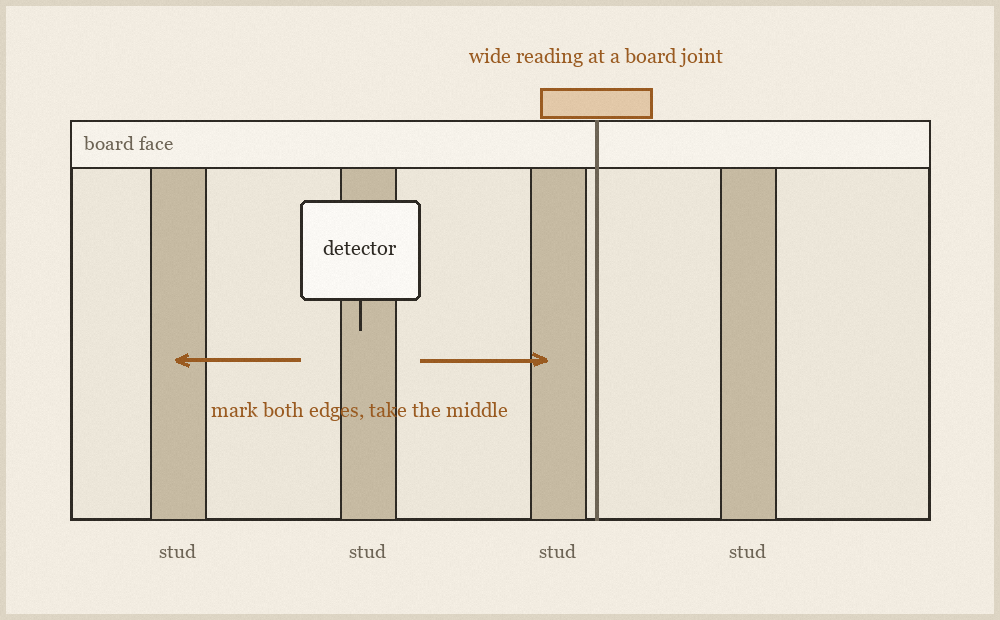
A density stud finder does not find timber. It finds a change in how much material sits behind the surface, and then reports that change as an edge. Most of the time the change is a stud. Sometimes it is a board joint, a run of tape and compound, a pipe, a cable, an old repair, or a second layer of board that stops halfway across the room. The tool is not lying so much as answering a narrower question than the one you asked.
Calibrate on a known blank
Every detector of this type sets its baseline when you first press it to the wall, which means pressing it directly over a stud teaches it that a stud is normal, and it will then happily tell you the whole wall is solid. Start in the middle of a bay, well away from corners and openings, hold still for the calibration, and only then begin to move.
Move slowly and in a straight line. These tools sample as they travel and a quick sweep gives them too few samples to work with. If your hand rolls as you go, the sensor face lifts at one edge and the reading drifts, which is why a detector that seemed decisive going left to right disagrees with itself going right to left.
Find both edges, then take the middle
A single beep tells you almost nothing. Mark where the tool first triggers, keep going until it stops, and mark that too. The distance between the marks should be close to the thickness of the framing, and the centre of the timber is halfway between them. If your two marks are much further apart than a stud is wide, you have found something else: a doubled stud at an opening, a joint, or a service run.
Then look for the neighbours. Framing is repetitive, so once you have one centre, its companions should turn up at a regular spacing in both directions. Two hits that do not fit the rhythm of the others are worth doubting. Three hits that do fit are worth trusting.
Confirming without a big hole
The cheapest confirmation is a fine bradawl or a small drill bit pushed through at a point that will be hidden by the thing you are about to hang, or low down behind where the skirting sits. Solid resistance the whole way means timber; a sudden loss of resistance after the board thickness means a cavity and a mark in the wrong place. A pin hole is a minute with filler; a heavy fixing pulled out of a cavity is a repair.
Tapping still works and is worth learning alongside the tool. The hollow bays ring, the framed lines thud, and the change is clear once your ear has heard the difference a few times on a wall you have already proved with the drill.
Before you drill anywhere
Treat the zones directly above and below sockets and switches as occupied, and treat the band near the ceiling and near the floor the same way, because cable runs and pipework commonly follow those paths. If a detector with a live-conductor setting warns anywhere near your intended fixing point, move the fixing rather than trying to work out how far the warning extends. Nothing you are hanging is worth guessing about.